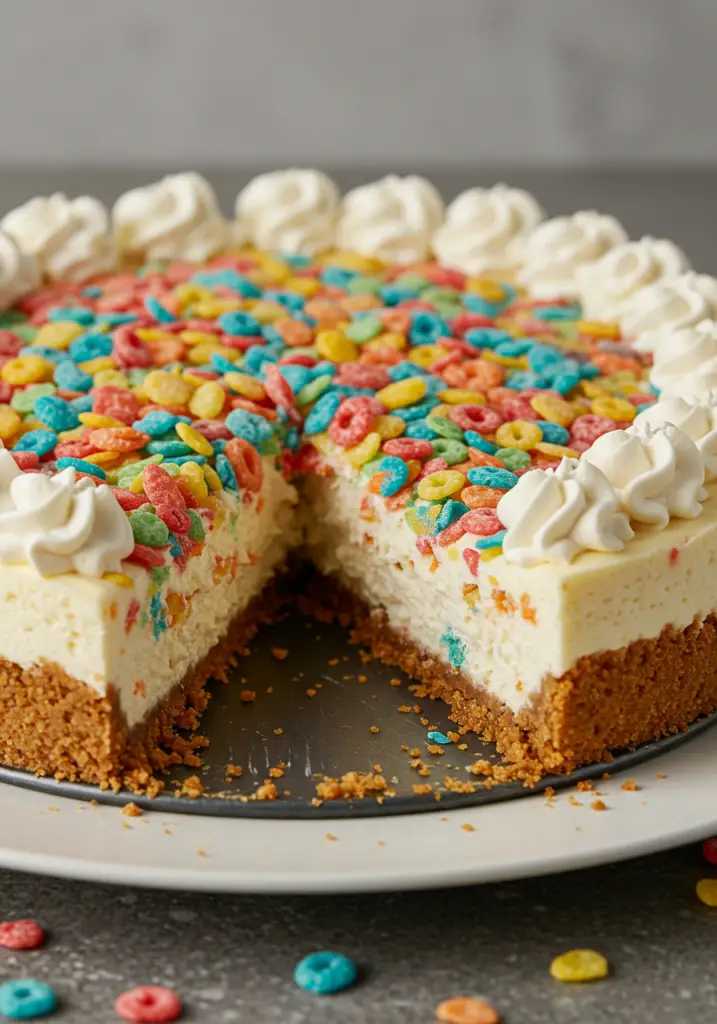
If you’re looking for a fun, colorful dessert that’s as easy to make as it is delicious, this No-Bake Fruity Pebbles Cheesecake is exactly what you need! With a crispy Fruity Pebbles cereal crust and a smooth, creamy cheesecake filling swirled with even more cereal magic, this treat is a nostalgic, eye-catching crowd-pleaser that requires zero oven time. Perfect for birthdays, parties, or anytime you want to bring smiles to the table.


Craving more creative no-bake treats? Subscribe now for sweet ideas delivered straight to your inbox.
Why You’ll Love This Recipe
No Oven Needed – Stays cool and simple with a no-bake method.
Vibrant & Fun – Fruity Pebbles add a pop of color and crunch.
Kid-Friendly – A guaranteed hit with both kids and adults.
Quick to Prepare – Just chill and serve, with only 20 minutes of hands-on time.
Great for Parties – Eye-catching and sliceable, perfect for celebrations.
Ingredients You’ll Need
For the Fruity Pebbles Crust:
- 3 cups Fruity Pebbles cereal
- 5 tbsp unsalted butter, melted
- 1½ tbsp granulated sugar
For the Cheesecake Filling:
- 16 oz cream cheese, softened
- ½ cup powdered sugar
- 1 tsp vanilla extract
- 1½ cups heavy whipping cream, cold
- 1 cup Fruity Pebbles cereal (for mixing into the filling)
Optional for Topping:
- ¼ cup Fruity Pebbles cereal
- Whipped cream or piped frosting
- Maraschino cherries or sprinkles (for added decoration)
Tools You’ll Need
9-inch springform pan
Mixing bowls
Electric mixer or stand mixer
Spatula
Measuring cups and spoons
Plastic wrap or foil for chilling
Step-by-Step Instructions
Step 1: Make the Crust
In a large bowl, mix 3 cups of Fruity Pebbles with granulated sugar.
Add the melted butter and stir until all the cereal is coated.
Press the mixture firmly into the bottom of a 9-inch springform pan to form an even crust.
Place in the freezer for 10–15 minutes while you prepare the filling.
Step 2: Whip the Cream
In a chilled mixing bowl, use an electric mixer to beat the cold heavy whipping cream until stiff peaks form.
Set aside in the refrigerator while you prep the rest of the filling.
Step 3: Make the Cream Cheese Mixture
In another large bowl, beat the softened cream cheese, powdered sugar, and vanilla extract until smooth and creamy.
Make sure there are no lumps for a silky cheesecake texture.
Step 4: Fold in the Whipped Cream
Gently fold the whipped cream into the cream cheese mixture using a spatula.
Mix slowly to maintain a light and fluffy texture.
Step 5: Add the Cereal
Stir in 1 cup of Fruity Pebbles cereal into the cheesecake filling.
Fold gently so the cereal is evenly distributed without crushing it too much.
Step 6: Assemble the Cheesecake
Remove the crust from the freezer and pour the filling over the crust.
Smooth the top with a spatula to create an even layer.
Sprinkle extra Fruity Pebbles on top for color and crunch.
Cover with plastic wrap and refrigerate for at least 6 hours, or preferably overnight.
Step 7: Serve and Enjoy
Once set, carefully release the springform pan.
Decorate the cheesecake with whipped cream swirls, more Fruity Pebbles, and optional cherries or sprinkles.
Slice and serve chilled for the best texture and flavor.
Tips for the Best Fruity Pebbles Cheesecake
Use Fresh Cereal – For the crispiest crust and best flavor.
Chill Thoroughly – Give it at least 6 hours in the fridge to set properly.
Fold Gently – To keep the whipped cream light and airy in the filling.
Don’t Overmix the Cereal – Preserve the crunch and color by folding it in just until combined.
Line the Pan – A strip of parchment paper on the sides helps release the cake cleanly.
Serving Suggestions
Serve with fresh fruit like strawberries or kiwi for a colorful contrast.
Drizzle with white chocolate or strawberry sauce for an extra treat.
Add themed sprinkles for birthdays or holidays to match any celebration.
Pair with milk, iced coffee, or fruit punch for a fun dessert pairing.
How to Store & Freeze
Storing:
Refrigerate: Cover and store the cheesecake in the fridge for up to 4 days.
Keep it chilled to maintain the texture and firmness.
Freezing:
Freeze the entire cheesecake or slices wrapped in plastic wrap and foil for up to 1 month.
Thaw overnight in the refrigerator before serving.
Make-Ahead Tips
Make the cheesecake 1-2 days in advance to save time.
Wait to add whipped cream or toppings until just before serving to keep them fresh.
Prepare extra crust mixture and store in the freezer to use for other no-bake desserts.
Frequently Asked Questions
1. Can I use marshmallows in the crust instead of butter?
Yes! Melt 4 cups mini marshmallows with 2 tbsp butter and stir in 3 cups of cereal for a crispy treat-style crust.
2. Can I use low-fat cream cheese or whipped topping?
You can use light cream cheese, but avoid fat-free for best results. Whipped topping (like Cool Whip) can replace homemade whipped cream for a shortcut.
3. Can I make this gluten-free?
Yes, just check that your Fruity Pebbles are labeled gluten-free and use certified GF ingredients.
4. What if I don’t have a springform pan?
Use a deep pie dish or an 8×8-inch square dish lined with parchment paper for easy removal.
5. Can I use other cereals?
Definitely! Try Cocoa Pebbles, Rice Krispies, or even crushed graham crackers for a different twist.
Final Thoughts
This No-Bake Fruity Pebbles Cheesecake is the ultimate dessert mashup of creamy cheesecake and colorful cereal crunch. It’s a nostalgic favorite with modern no-bake convenience, making it ideal for everything from birthdays to family dinners. With its vibrant look and irresistible flavor, this dessert is sure to steal the spotlight.
Go ahead—make it once and it’ll be your new favorite no-bake treat. Don’t forget to snap a photo and share it online. Everyone will want the recipe!
Preparation Time: 20 minutes
Chilling Time: 6 hours (minimum)
Cuisine: American
Nutritional Information (Per Slice, Serves 10):
Calories: 390 | Protein: 5g | Carbohydrates: 34g | Fat: 26g | Fiber: 1g | Sodium: 180mg


No-Bake Fruity Pebbles Cheesecake
- Total Time: 20 minutes
Description
If you’re looking for a fun, colorful dessert that’s as easy to make as it is delicious, this No-Bake Fruity Pebbles Cheesecake is exactly what you need! With a crispy Fruity Pebbles cereal crust and a smooth, creamy cheesecake filling swirled with even more cereal magic, this treat is a nostalgic, eye-catching crowd-pleaser that requires zero oven time. Perfect for birthdays, parties, or anytime you want to bring smiles to the table.
Craving more creative no-bake treats? Subscribe now for sweet ideas delivered straight to your inbox.
Ingredients
For the Fruity Pebbles Crust:
-
3 cups Fruity Pebbles cereal
-
5 tbsp unsalted butter, melted
-
1½ tbsp granulated sugar
For the Cheesecake Filling:
-
16 oz cream cheese, softened
-
½ cup powdered sugar
-
1 tsp vanilla extract
-
1½ cups heavy whipping cream, cold
-
1 cup Fruity Pebbles cereal (for mixing into the filling)
Optional for Topping:
-
¼ cup Fruity Pebbles cereal
-
Whipped cream or piped frosting
-
Maraschino cherries or sprinkles (for added decoration)
Instructions
Step 1: Make the Crust
In a large bowl, mix 3 cups of Fruity Pebbles with granulated sugar.
Add the melted butter and stir until all the cereal is coated.
Press the mixture firmly into the bottom of a 9-inch springform pan to form an even crust.
Place in the freezer for 10–15 minutes while you prepare the filling.
Step 2: Whip the Cream
In a chilled mixing bowl, use an electric mixer to beat the cold heavy whipping cream until stiff peaks form.
Set aside in the refrigerator while you prep the rest of the filling.
Step 3: Make the Cream Cheese Mixture
In another large bowl, beat the softened cream cheese, powdered sugar, and vanilla extract until smooth and creamy.
Make sure there are no lumps for a silky cheesecake texture.
Step 4: Fold in the Whipped Cream
Gently fold the whipped cream into the cream cheese mixture using a spatula.
Mix slowly to maintain a light and fluffy texture.
Step 5: Add the Cereal
Stir in 1 cup of Fruity Pebbles cereal into the cheesecake filling.
Fold gently so the cereal is evenly distributed without crushing it too much.
Step 6: Assemble the Cheesecake
Remove the crust from the freezer and pour the filling over the crust.
Smooth the top with a spatula to create an even layer.
Sprinkle extra Fruity Pebbles on top for color and crunch.
Cover with plastic wrap and refrigerate for at least 6 hours, or preferably overnight.
Step 7: Serve and Enjoy
Once set, carefully release the springform pan.
Decorate the cheesecake with whipped cream swirls, more Fruity Pebbles, and optional cherries or sprinkles.
Slice and serve chilled for the best texture and flavor.
Notes
Use Fresh Cereal – For the crispiest crust and best flavor.
Chill Thoroughly – Give it at least 6 hours in the fridge to set properly.
Fold Gently – To keep the whipped cream light and airy in the filling.
Don’t Overmix the Cereal – Preserve the crunch and color by folding it in just until combined.
Line the Pan – A strip of parchment paper on the sides helps release the cake cleanly.
- Prep Time: 20 minutes
- Cuisine: American


